
Disclaimer: This page may contain affiliate links. As an Amazon Associate, I earn on qualifying purchases. My participation in this program comes at no added cost to you, and helps support this blog. Learn more here.
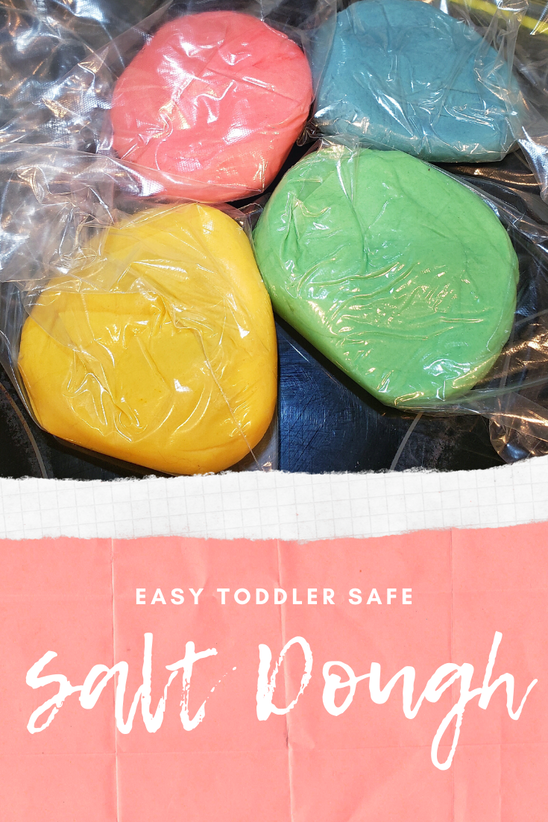
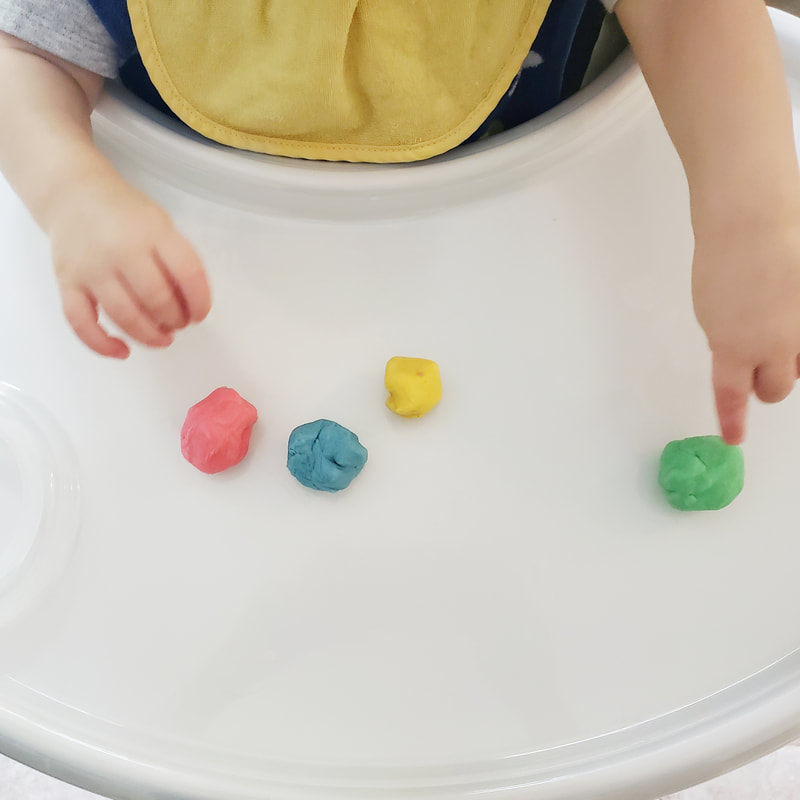
Toddlers crave opportunities to use their sense of touch to explore the world. And salt dough is an excellent and safe way to meet this need with ingredients you likely already have in your home. Salt dough is particularly appealing for families with young toddlers who are still putting everything in their mouths. While not particularly tasty, unlike some store bought options, it is made with entirely edible (and nontoxic) ingredients.
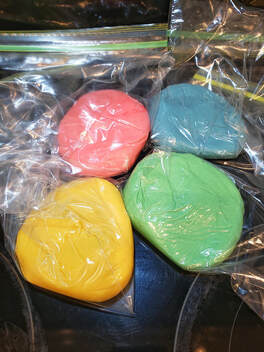
Below I've included a modified salt dough recipe that we've used successfully. It stays well in the refrigerator, and toddlers can help with making the dough too! Plus, it works great for DIY projects such as Christmas ornaments, handprint keepsakes, and more (see end of page for instructions)!
How to make Salt Dough
|
Believe it or not, AllRecipes.com is an excellent resource for "edible" projects (another fun activity is edible paint). Of course, I don't recommend encouraging your children to eat salt dough; for young toddlers, it could generalize to other forms of play dough that are not edible or give them a bit of a belly ache. Not a habit you want to encourage! So, I made modifications to an excellent recipe by Stacy Child for Colorful and Edible Play Dough to make it less appealing for my little one to eat (a secondary reason I made the changes was because we weren't sure the KOOL-AID or other available powdered drink mixes the recipe calls for would be safe for my LO's food allergies).
On the topic of food allergies, a word of caution; This recipe is absolutely not safe for the following allergies:
Gluten and Wheat
|
|
Additional Allergy Information: Please read the list of ingredients and determine whether any of your allergens are included in the list before proceeding, whether or not they are listed above. Additionally, please select products that are safe for your family based on your specific allergens. We are managing cashew, pistachio, peanut, and sesame within our family, but due to OIT are not or minimally cross contamination sensitive to nuts. Always research the products you decide to use in your home and ensure they meet your comfort level and allergy needs. Additionally, products can change their formulation or production process at any time. For this reason, I not provided "recommended products" for specific allergies but rather note what we use in our home, given our individual circumstances, at the time of publication. Information regarding products listed below should not constitute a guarantee of safety for any allergen. Use your best judgement and best practices for selecting safe products for your family. All information provided on this website is subject to our disclaimers and disclosure policy.
MODIFIED COLORFUL AND [LESS APPEALING FOR EATING BUT STILL] EDIBLE PLAY DOUGH
(originally published on AllRecipes.com by Stacy Child and modified by the Mindfully Scientific Mama)
(originally published on AllRecipes.com by Stacy Child and modified by the Mindfully Scientific Mama)
Ingredients (Annotated):
- 2 Cups Water
- 2 1/4 cups White Flour (we use Gold Medal in our home with cashew, pistachio and sesame allergies because our family trusts their product, but please always check with a company if you are looking to avoid shared lines or facilities)
- 2/3 Cup Salt
- 1.25 Tablespoon Cream of Tartar (we use McCormick in our home because our family trusts their product, but again, please confirm with the company if you want to avoid shared lines or facilities)
- 3 tablespoons vegetable oil
- Food Coloring of your choice (in the original recipe, the drink pack provides color)
Additional Equipment:
- Medium Sauce Pan
- Large Mixing Bowl
- Whisk
- Mixing Spoon
- Ziplock Bags for Storage
Directions:
Per Stacy's recipe, you will want to start by boiling the water in the sauce pan. Once hot, set it aside.
Separately, whisk flour, salt, and the cream of tartar in the large mixing bowl. Then slowly stir in the vegetable oil with the mixing spoon. Add the hot water while continuing to stir.
When cool enough, remove dough and begin to knead on a firm, floured surface. Separate dough into several balls, and add desired amounts of food coloring while continuing to knead each individual color separately (this is where to procedure differs from the original, hence rewriting the whole thing rather than linking directly to the original instructions!). Stacy dictates to do so until "smooth and elastic", and that the process should take approximately "8 minutes". As my chef husband says, you want to make sure you give ample time to "develop the glutens" (again, this recipe is not gluten allergy friendly).
We've had a blast using this recipe at home. My little one is still too young to build anything out of it, but when they get old enough to try, I'll update you on how it goes.
So you have the dough... now what?
Salt dough like this is an easy tool for building vocabulary, math and prescience skills. Here are some ideas for ways to make a fun activity educational:
During play (or prep if you are working with your child to make the dough too):
- Label color.
- Discuss texture. How does the dough feel?
- Pull the dough apart. Count how many pieces of dough you have. For older children, you can even use the dough to demonstrate fractions by taking a larger ball and splitting it into pieces and counting how many there are before combining them back into one whole ball (4 pieces each equal 1/4th, 3 pieces each equal 1/3, 2 pieces each equal 1/2).
- Mix colors. Discuss what colors you can make! During dough preparation, you can also have your child mix different colors using the food coloring and guess what color the dough will turn out.
- Create different shapes with the dough and label them.
And of course, just helping make the dough and following directions is a great activity in and of itself!
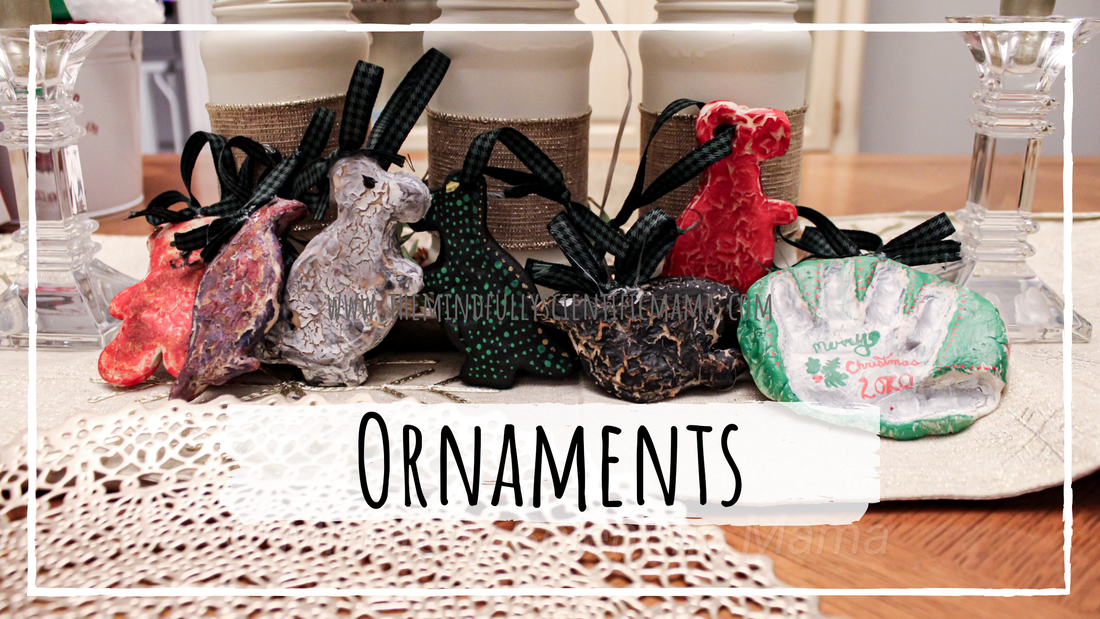
Keepsakes and Ornaments
Looking to use salt dough for something longer term? You can either bake or air dry your child's creations to create adorable keepsakes!
I recommend starting with plain dough, instead of dyed, but you can do either. Form using cookie cutters, hands, or other tools.
BAKING: Bake at 350 on a cookie sheet until hardened (make sure the dough is thin, otherwise it'll bubble and not cook through); in my oven this takes about 45 minutes, but time will vary.
AIR DRYING: Air drying results in a better finished product, but can take several days. Be sure to dry on a cookie cooling rack in order to get airflow to all sides of the creation!
Once the project is hard, your child can easily paint it! Acrylic paint gives the look, but isn't great for younger children. We tried finger paint (the safest option for the youngest hands), but this may saturate the dough can cause it to soften some. Water based paints will result in the most softening, but you can really use whatever you have on hand if this is a kid's project!
Let the paint dry, use hot glue to add any embellishments (have your child tell you where they want things added, since a hot glue gun isn't child safe!), and you're done!
Note: To create Christmas ornaments, you'll want to use the hot glue gun to attach a loop of ribbon (alternately, create a hole in the project before baking/drying). We also added bows to the tops of our ornaments.
Happy crafting and playing!


Content on this website is for informational purposes only. Read more of our information disclaimer here.
